
 myCSUSM


Using Perusall for Shared Annotation of Course Readings
Getting students to complete the assigned readings before class is often a problem. Perusall is a free social learning platform for reading and annotating that aims to motivate students through active and collaborative learning strategies.
How it works is you create a “course” in Perusall, upload readings (or adopts the electronic version of a textbook from publishers), then create reading assignments. While reading the text, students highlight, post or reply to comments or questions associated with the highlighted material, or create private notes.
Perusall creates groups and calculates grades based on multiple factors. As the due date approaches, Perusall monitors continuously, and sends students a private nudge with help and directions. Best of all, the Perusall dashboard provides you with a window into your students’ learning. The software generates a confusion report and other analytics about individual student engagement, as well as alerting you to at risk students.
Perusall is integrated into Cougar Courses and does not require a separate license or login for you or your students.
NEW! Summer 2024 Perusall LTI 1.3 Update
Perusall is updating from LTI 1.1 to LTI 1.3 before the Summer 2024 term.
- If you used Perusall prior to Summer 2024 then you used Perusall LTI 1.1 and so the first time you launch Perusall LTI 1.3 after the first week in June, it will prompt a one-time "confirm merge" email. This just means that your account was originally on a different integration and it is transitioning to the new one. You will need to confirm the merge and relaunch.
- All of your previous Perusall content is still available in your Perusall account under "My Courses". You are able to copy course materials from a 1.1 course to a 1.3 course. For instructions on copying course materials from one course to another, see How do I transition my Perusall course from an LTI 1.1 integration to LTI 1.3?
- With 1.3, grade sync settings now allows you to choose whether Perusall should create gradebook columns in your Canvas course automatically, OR manually. For more information, see Grade Sync in LTI 1.3.
- What's the difference between 1.1 & 1.3?
- For other questions & answers, see 1.3 FAQ.
Getting Started with Perusall 1.3
This video covers adding Perusall 1.3 to your Cougar Courses container, setting up grade sync, and an overview of deep linking in CC and how that will help you manage the assignment creation either manually or automatically.
Perusall 1.3 offers many new benefits:
- Roster Sync: The first time an instructor launches their Perusall course, their entire LMS course roster is available under the Students tab within their Perusall course and is updated each time the instructor launches Perusall.
- Improved Grade Sync: Instructors no longer need to build assignment-specific links with case-sensitive titles in CC in order to successfully sync grades. In fact, students just need to click at least one Perusall link in your LMS course (at least once), and we will be able to sync all of their grades from the course. More information on Grade sync in LTI 1.3.
- Improved Group Sync Options: Instructors can now choose which Group Set in CC to send to Perusall to use.
- What's the difference between 1.1 & 1.3?
Perusall Instructor Support
The instructions below will help you get up and running with Perusall. If you can't find the answer here, check Perusall Instructor Support. If you need to contact Perusall for assistance, while on the Knowledge Base page, click "Contact Perusall Support" in the upper right.
Creating Your Perusall Course
- In your Cougar Courses course go to the course Settings.
- Click on the Navigation tab.
- Scroll to the bottom of the page and look for Perusall 1.3 in the list of disabled navigation links.
- Click the Options icon (three-dots) to view the options menu
- Click Enable to add Perusall 1.3 to the course navigation.
- Scroll to the bottom of the page and click Save.
The Perusall Interface
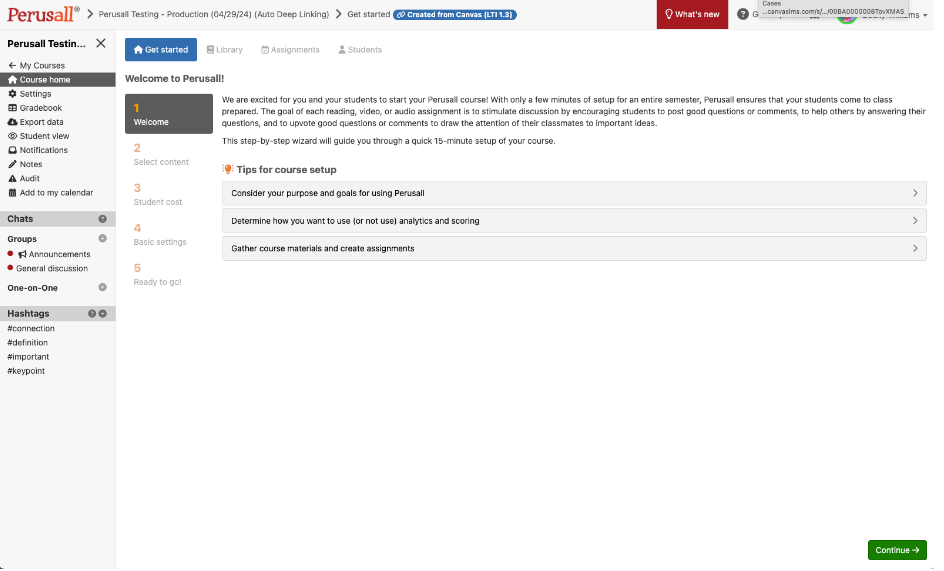
- My Courses: View and access your other Perusall courses.
- Course home:
- Get Started: Set course details (more information on the 5-steps to get started). Students will see the welcome message, library and assignments.
- Library: Add content by uploading documents, web pages, or use the Perusall catalog (note: using the catalog could result in a fee for students)
- Assignments: Create and delete assignments, including differentiated assignments view and download your class roster
- Students: Your roster in Perusall will populate automatically as students launch Perusall from Cougar Courses.
- Settings: Set course details (including a welcome message), adjust course grouping, and set scoring options.
- Gradebook: View current scores for each assignment
- Export data: Export all content, all comments, assignment information, or all course data.
- Student view: Use this to see what your students will see.
- Notifications: Users are notified via email when anyone responds to a question they’ve posted, or when they’re mentioned in a comment. All notifications can be viewed, and managed here.
- Notes: Users are able to create notes and share them with another user or the instructor. Notes created here are private unless shared with others.
- Audit: The audit dashboard allows you to review comments that have been flagged.
- Add to my Calendar: Perusall provides an assignment calendar that you can subscribe to from the calendar on your computer or phone; depending on your calendar app's settings and capabilities, the calendar can also update automatically if new assignments are added or if due dates change.
- Announcements: Create and view announcements. Only instructors can create announcements but students can view and respond.
- General Discussion: This is an open chat for discussion, available to everyone.
Course Setup
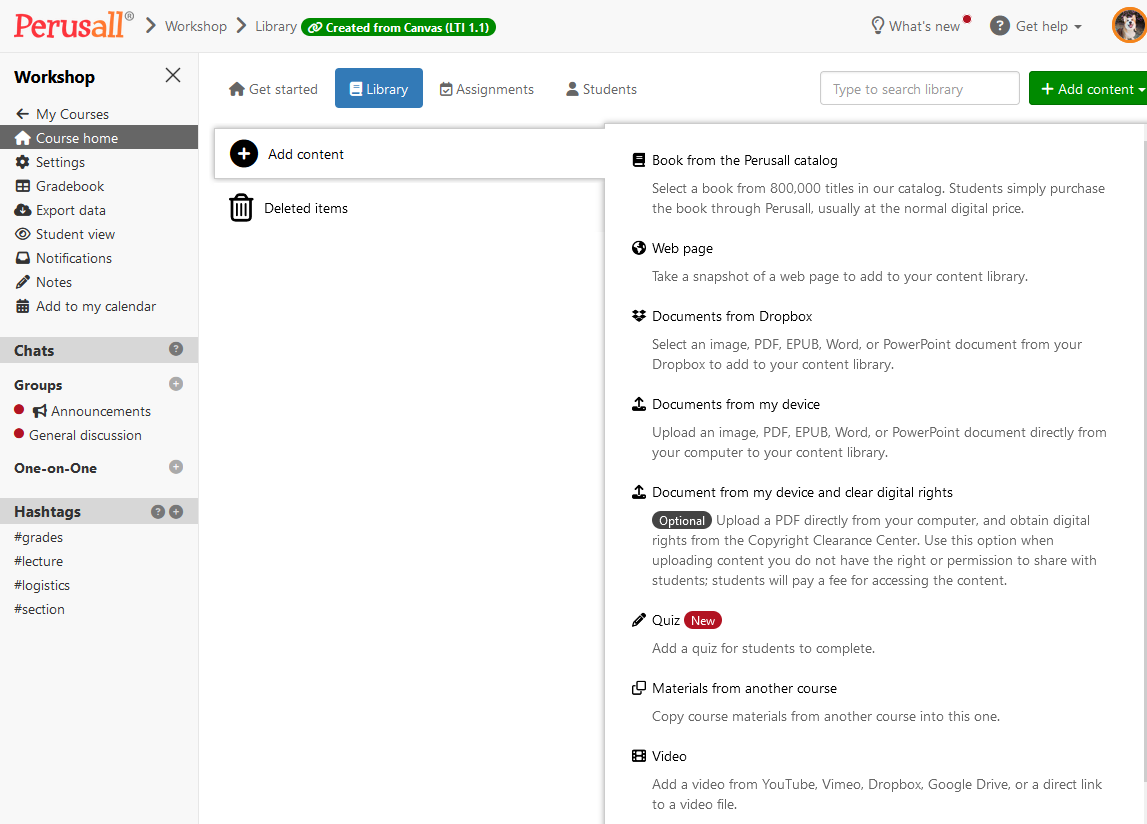
Adding Content
- From your Course home page, click on Library.
- To add content from Perusall's catalog, click Add Content > Book from Perusall Catalog.
- To upload a reading (PDF, Word doc, etc.) from your computer, click Add Content > Documents from my device or Add Content > Documents from Dropbox.
- To add a web page as a reading, click Add Content > Web page.
- To add content (and/or assignments) from another Perusall course, click Add Content > Materials from another course.
- To add a video click Add Content > Video (YouTube, Vimeo, Google Drive, etc.)
- To add a quiz, click Add Content > Quiz.
Learn more about adding content to your Perusall course.
Creating Assignments
- Click on Assignments on your course home page.
- Click Add assignment and select the content item you want to assign.
- Select the part of the item to assign (all content or assign page rangers) and click Next Step.
- Specify a deadline, assignment name, and instructions for students including additional settings and reminders. When finished click Next Steps.
- Choose course scoring settings or specific new soring settings for the assignment and click OK. Note: Scoring is set with a range from the lowest possible score a student can receive to the highest possible score a student can receive. If you would like Perusall to automatically give credit for students submitting any work at all, you can set the threshold score to 0
Learn more about managing assignments.
Setting Course Policies
- Navigate to Settings > General to set overall course policies about assignment availability and welcome message.
- Navigate to Settings > Grouping to manage discussion groups. Learn more about groups
- Navigate to Settings > Scoring to determine how Perusall will generate engagement scores, when to sync scores to Cougar Courses, and when scores are released to students.
- Navigate to Settings > Advanced to adjust fine-grained course options such as assignment score precision and hiding grade feedback from students.
Viewing Discussions Within Content
- Navigate to Course home.
- Open a document in the Library tab, or open an assignment in Assignments tab.
- When you (or your students) open a document, you'll see highlights superimposed on the document that represent comments that students have entered.
- Highlight text by clicking and dragging. You will see a new conversation panel appear on the right side of the page. Enter a comment or question, and press Enter to save it.
- When you start a comment thread, the text you highlighted will show in blue; student comments are highlighted in yellow.
- When someone responds to a question or comment, the original author receives a notification by email and can post their own response by replying to the email. Students that ask a question can also indicate that one or more of the responses answers their original question.
- Control the highlights that you see by clicking the All comments filter dropdown at the top of the page and selecting a filter.
Grading in Perusall
General Grading Options
There are two options that need to be set if you are going to manually grade your students.
- Navigate to the Settings tab and click on the Scoring tab across the top.
- Set when Perusall should release scores to students: immediately, as student submits, only after instructor manually releases them, after assignment deadline has passed, etc.
- Next, enter a lowest and highest possible score for students. This will allow you to grade based on the point range you enter.
- Only use the “threshold score for credit” option if you want student scores to be reported as credit (1) /no credit (0). (Credit is given for scores at or higher than this threshold value, on the assignment score scale specified above. Set to 0 to indicate that submitting any work at all should result in credit for the assignment. Leave blank to disable threshold scoring.)
- When finished, click Save Changes.
Automatic Scoring Criteria
Perusall has an automatic scoring feature that allows you to assign full credit when a student does anything in an assignment (ex: leaves a comment, asks a question, etc.).
- Navigate to the Settings tab and click on the Scoring tab across the top.
- Scroll down to the Automatic scoring criteria and click into each of the rubric criteria to set the percentage for each criteria.
- Click the option button in each criteria to open additional options regarding how Perusall should award credit.
- Make sure all your percentages equal 100%, use 0% for any field you do not want counted towards students scores. (ex: Set quizzes to 0 if you are not using the quiz feature inside Perusall).
- Once you are happy with how Perusall will award points to students click the Save Changes button.
Learn more about scoring in Perusall.
Syncing Your Grades to Cougar Courses
There are three ways to sync the grades in Perusall to your gradebook in Cougar Courses. You can sync individual Perusall assignment grades, sync the average Perusall score for each student, or you can export the grades to Excel and then import them into Cougar Courses manually in order to pick and choose which scores are used or import a combination of scores.
Sync Individual Assignment Scores
If you are wanting to sync individual assignment grades, first choose if you want to manually sync individual assignment scores or automatically sync assignment scores.
- In Settings > Scoring > General: Select "Manually sync individual assignment scores back to the LMS" if you would like to send scores to Cougar Courses in separate gradebook columns for each assignment in Perusall. With this option, Perusall will not send any scores to Cougar Courses until you explicitly ask for grades to be synced for a particular assignment by selecting Gradebook > Sync to LMS at the bottom of the corresponding gradebook column in Perusall.
- In Settings > Scoring > LMS Grade Sync: Select "Automatically sync individual assignment scores back to the LMS" if you would like to send scores to Cougar Courses in separate gradebook columns for each assignment, but would like this to happen automatically. All released scores (i.e., scores visible to students within their Perusall accounts) will be synced. Most scores will sync immediately upon updating, but occasionally may take up to an hour to sync automatically; you can always force an immediate sync by selecting Gradebook > Sync to LMS at the bottom of the corresponding gradebook column in Perusall.
Next, you will want to choose how to manage the gradebook columns for your Perusall assignments in Cougar Courses.
- The default option, "Perusall creates gradebook columns in LMS for each Perusall assignment automatically" results in Perusall managing the process of creating a gradebook column in Cougar Courses for each of your Perusall assignments. Perusall will automatically inform Cougar Courses of the name of the assignment, the number of points, and the deadline, and keep this information up-to-date when you create, update, or remove assignments within Perusall. If you use this option, there is no need to create individual assignment links in Cougar Courses for students to click on; students can enter Perusall through a generic link.
- If you prefer to create "deep links" in Cougar Courses to individual Perusall assignments, you may prefer to select "Instructor creates deep links in LMS; no Perusall gradebook columns will appear in LMS until deep links have been created." With this option selected, Perusall will not automatically create and manage gradebook columns in Cougar Courses. Instead, Perusall will send student scores back to the gradebook columns that Cougar Courses creates for the deep links you set up. If you do not create a deep link pointing to a particular Perusall assignment, Perusall won't sync the scores for that assignment back to Cougar Courses. This option may be preferable if you plan to create your own deep links because you would like these deep links organized in a particular way within Cougar Courses. This method will be familiar if you used Perusall 1.1 and added assignments individually in Cougar Courses to sync each to the gradebook. More information about Grade Sync in LTI 1.3
Sync Average Score
Instead of syncing individual assignment scores, you can sync a student’s average score (each individual assignment score summed and then divided by the total number of assignments).
- In Perusall, navigate to the Settings tab and then click Scoring. Scroll to "Grade sync to LMS" setting and select "Automatically sync students' average scores back to the LMS" and click Save changes.
- Perusall will calculate each student's average score (across all released assignments) and automatically sync this score into a gradebook column called "Perusall" in Cougar Courses.
Note: Perusall will never sync grades to Cougar Courses that have not been released to students within Perusall. Release grades to students by clicking the button at the bottom of the corresponding column within the Perusall gradebook, or set an automatic grade release policy under Settings > Scoring > General > Release scores to students.
Learn more about average grade sync in Perusall.
Turn Off Sync and Manually Export/Import Grades
If you do not want the grades to automatically sync, you can export the gradebook from Perusall and import into Cougar Courses manually.
- In Perusall, navigate to the Settings tab and then click Scoring. Scroll to "Grade sync to LMS" setting and select "Do not sync grades back to the LMS" and click Save changes.
- In Perusall, navigate to the Gradebook and click the Download button at the top of the page.
- You can use Excel to edit the data and then copy the columns you want added back into Cougar Courses.
- To import new grade columns into CC you will want to first download the gradebook from CC. In CC, click on Grades, then the Actions drop down menu, and select Export Entire Gradebook.
- Copy the columns from the Perusall spreadsheet and paste them at the end of the sheet you downloaded from CC.
- In your CC gradebook, click the Actions drop down menu, and select Import.
- Click the Choose File button, select the spreadsheet, and then click the Upload Data button.
- Once the data processes, CC will ask you what to do with the new columns. For each Perusall column you added select “A new assignment” from the drop down and assign the total points possible then click Continue.
- Once you have reviewed the changes click the Save Changes button at the bottom of the page.
Learn more about how to export and import the Canvas gradebook.
Student Resources
To get your students started in Perusall, considering adding these resources to your course: